Before counting physical inventory, the report must contain at least one batch. A batch is what allows you to add items to the report and is an organized way to count your inventory.
General information to keep in mind when creating batches:
- Batch examples: Your practice most likely has different areas where inventory is stored. It might be appropriate to name a batch after a storage location as well as the type of product within that location, (e.g., Women's Frames, Men's Frames, Sunglass Cabinet).
- Batch names cannot be updated or edited once they are created.
- Spell check is not enabled for the batch name field.
- Batches cannot be canceled or deleted. Note: Do not add items to a batch if it has been added in error.
- Item quantity within a batch can be updated until the 'Finished Counting' button has been enabled, (step 2 in the Finished Counting section below).
- Items cannot be deleted from a batch. Note: If an item has been added in error, ensure the item quantity is set to zero.
Instructions
Create Batch
- Follow the instructions for Inventory Reconciliation - Create Report, or, open an existing report.
- Click 'Create Batch.'
- Name the batch and click 'Create Batch.'
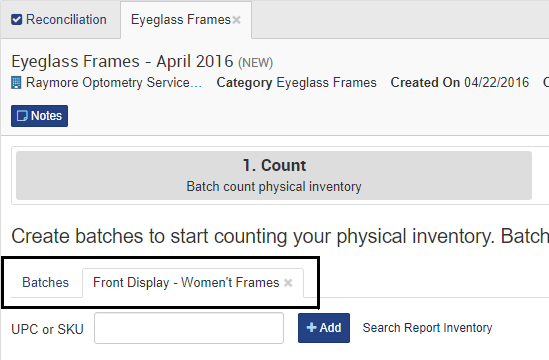
- A tab with the batch name is added beside the tab for Batches. The new batch is opened and inventory items can be added to the batch. See Example
- As appropriate to your situation, create additional batches for this report.
Add Items
- Open an existing batch or create a batch. Start the counting process through one of the following methods:
- Scan a UPC or SKU barcode: The system will automatically add the item count to the batch. Scan all items and the system will continue to add the items to the existing batch. This method is highly recommended.
- Manually enter the UPC or SKU barcode and click 'Add,' or enter key. The system will automatically add the item to the batch as you click add or enter.
- Click 'Search Report Inventory' to search for an item.
- If needed, adjust the item quantity and click 'Add.' The system will automatically add the item to the batch.
- Input new search criteria and add the next item.
- Click 'Clear' to clear the search results.
- Click 'Add by UPC/SKU' to return to the barcode scanner view.
- The following applies to items added:
- Whether an item was scanned or manually added, a banner message indicates the item was successfully added to the batch.
- If an item is scanned or manually added multiple times to the same batch, only one line-item displays and the quantity for that item increments each time the same item is added.
- If multiple items match the search criteria, they are displayed below the search fields. Click 'Add' to select the appropriate item.
- If no item matches the search criteria, text displays that "No products were found."
- Continue adding items associated to this batch.
- Click the tab for Batches to return to the batches view.
- Create additional batches for this report, if appropriate.
- Return to any batch if additional inventory needs to be added to a specific batch.
- When ALL physical inventory that you want associated to this report has been counted, refer to the instructions below for Finished Counting.
Finished Counting
- Finished counting means all physical inventory has been counted for THIS REPORT. This is NOT a reference to the counting process of individual batches.
- You must be viewing the Batches tab. If you do not see the button for 'Finished Counting,' click the Batches tab to change your screen view.
- Click 'Finished Counting.'
- Follow the instructions for Inventory Reconciliation - Review.